Bonus Content
Guide to Ultimate Sharpness
Here is a checklist to get the sharpest images
Bonus Content
Guide to Ultimate Sharpness
Follow this checklist and get crazy sharp images
Sharp images are an enigma. Every photographer has had the experience of catching an image that looks really fantastic on the back of the camera. It may even look good on the computer screen. However, when you zoom in on the photo it becomes clear that the photo is not as sharp as you expected.
This lesson is a checklist of things you can do to get the sharpest possible images. NOTE: There is a difference between sharpness/focus and blur. Blurred images are a result of the camera or the subject moving and out-of-focus images are the result of human error in the process of focusing.
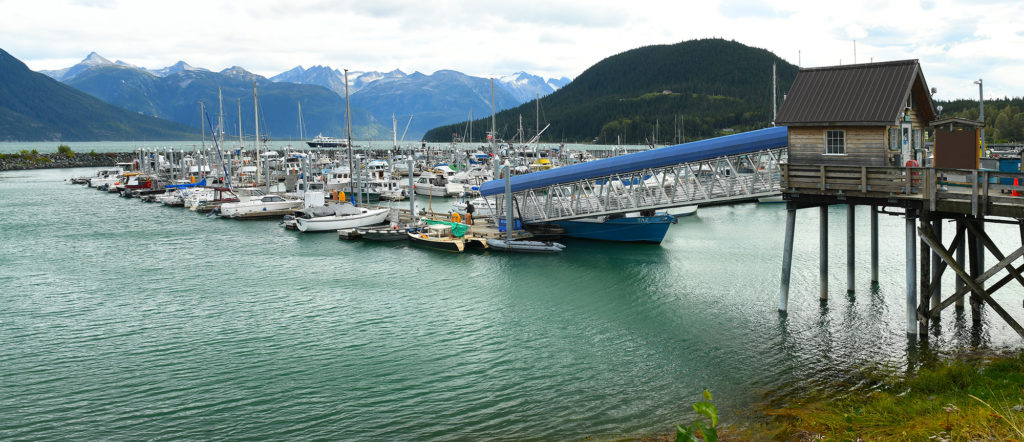
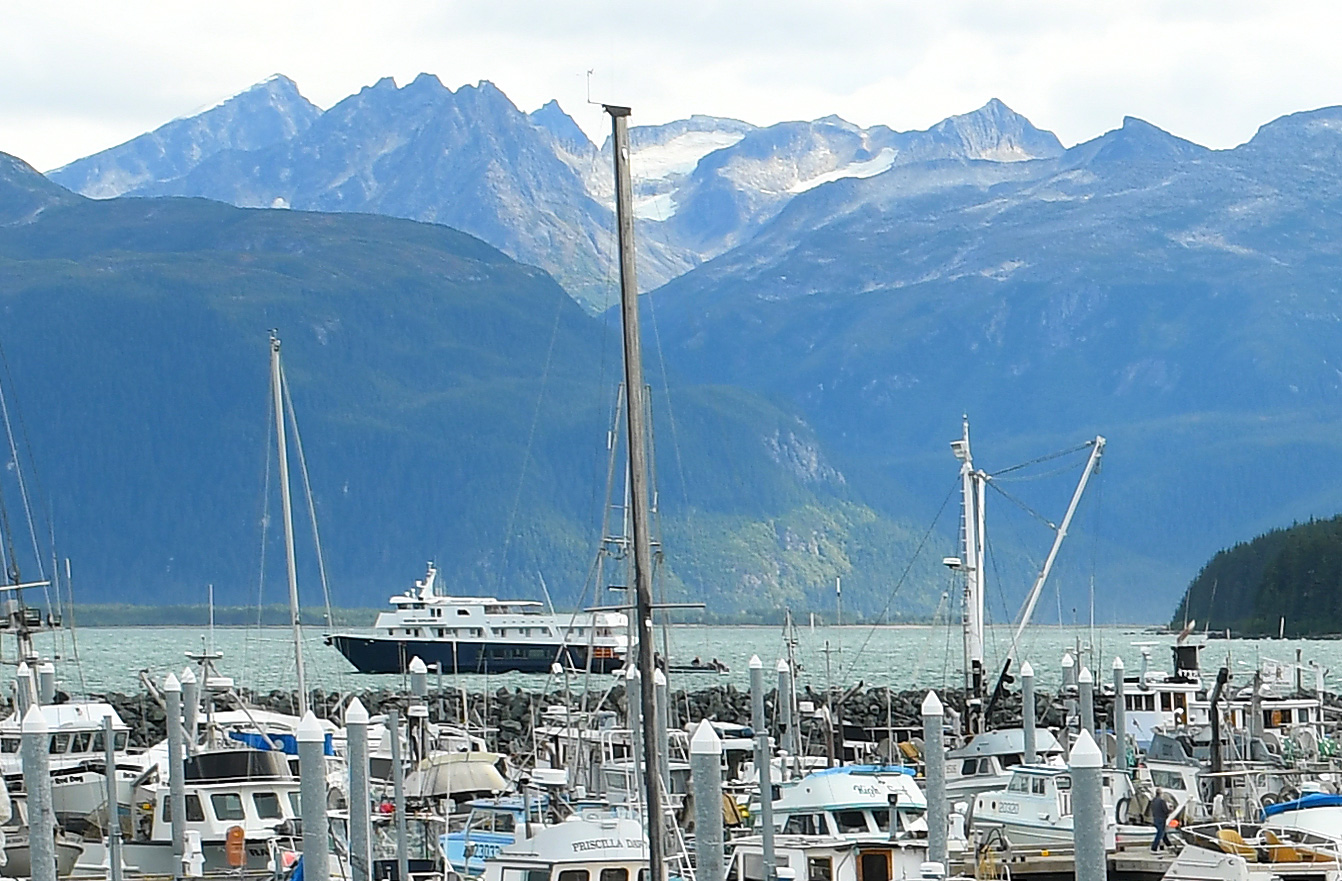
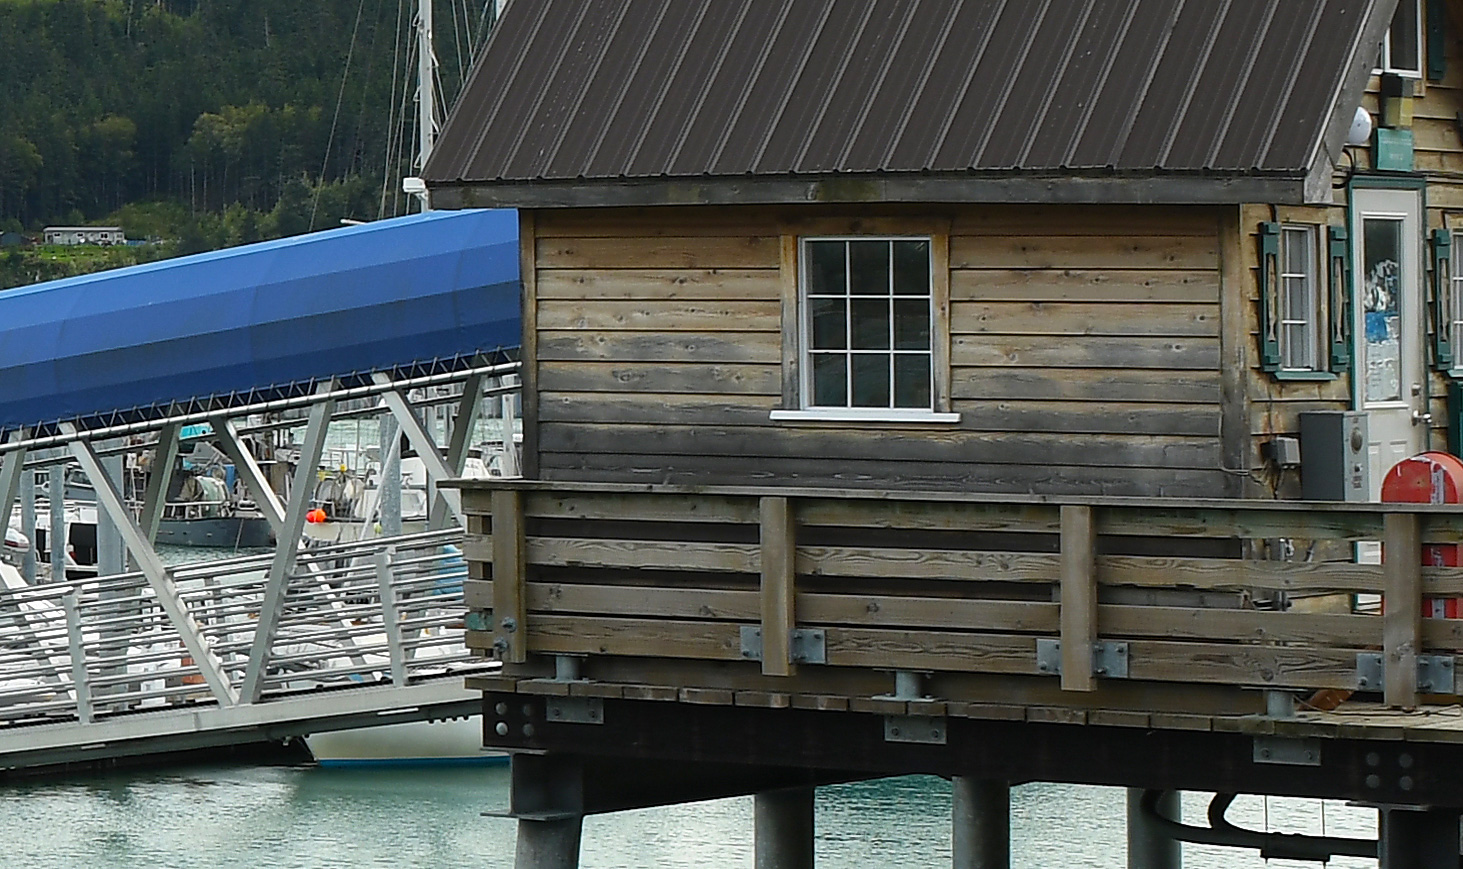
Scroll down to see zoomed-in cropped sections of this photo.
So let’s get started with a few facts.
Every lens is sharpest in the range of f8 – f11. When you use apertures such as f2.8 or f22 (the numbers on either end of the aperture scale) sharpness suffers.
There is a direct relationship between sharpness and stabilizing the camera.
Focusing is important. Not just focusing but focusing correctly.
The quality of the lens does affect the overall sharpness, but it’s not a deal breaker.
The Sharpness Checklist. SAFTI
SUBJECT First, we need to pick a subject with which we can achieve ultimate sharpness. If you want to take action shots of the kid’s basketball game, you will never get ultimate sharpness. Landscapes and still-life shots are the right places to try out shots that show off ultimate sharpness.
APERTURE Make your aperture smaller, but not too small. All lenses tend to be sharper towards the middle of the aperture scale. For ultimate sharpness set the aperture to f8 or f11.
FOCUSING. Remember that focusing is a distance. That means that the camera can only focus on one distance. At the settings listed above, you can focus manually and if your camera has a live preview, you can use the live preview to help you manually focus.
TRIPOD. Stabilize the camera. To get ultimate sharpness you must use a tripod. Period. There is no substitute for using a tripod. If you choose to hand-hold the camera the following items become difficult, if not impossible.
ISO. In every shooting situation, we set the ISO first. And if our goal is ultimate sharpness then I want to set the ISO to the best quality. So, set the ISO to 100. When we move to higher ISO values, quality suffers as the photos tend to get noisy/grainy.
Extras:
REMOVE THE NECK STRAP. Even a small breeze blowing the strap around is enough to shake the camera on the tripod and ruin the photo.
STAY STILL. Control your breathing, fire on the exhale or use a remote trigger so that you don’t shake the camera when you are pressing the shutter button.
SHOOT LOTS Take a shot, re-adjust the manual focus and take another shot. Do it again. And again. If you only take one shot and it’s focused incorrectly, then too bad, so sad.
EXERCISE: Select a subject to practice on. Usually, an interesting landscape will do the trick. Set the ISO to 100, Aperture to f11, place the camera on a tripod, and then set the camera to manual focusing. Now, with the live view turned on, manually focus the lens until you are happy with the focus. Take a shot, being careful not to move the camera while pushing the trigger. Repeat the process a few times. Change the height of the tripod and the location. Adjust the shutter speed when necessary for changing lighting conditions. Every time you move the position of the tripod, re-focus the camera and then repeat the focusing after each shot.
NOTE: If the subject is a puppy and you are shooting indoors, this will not work as the shutter speeds will be slow and the puppy will move. Pick the right subject such as a landscape or still life.
One more bit of advice on sharpness
One more small note about sharpness. If you are using a wide-angle lens or an ultra-wide angle lens such as a 10-20mm or 14mm or even 20mm these lenses tend to lose sharpness toward the edges of the photo. The details in the middle of the photo are often much sharper than the details toward the outside edges. To correct this, select a focal length that has less of this distortion. Lenses with focal lengths like 24mm-100mm tend to have the best coverage of sharpness.